Thinking of making your outdoor great with low voltage landscape lighting is a great option. If you are thinking of installing low-voltage landscape lighting, there are two ways to it. You may get a professional to do it for you, or you do it yourself. While the former may cost you a fortune, the latter poses a risk of unprofessional delivery.
However, self-installation allows you to run it in your creative way. It is a flexible way of making your landscape lighting. So, in this piece, we shall look at the DIY tips on installing low-voltage landscape lighting.
DIY Low Voltage Landscape Lighting
Low voltage landscape lighting is efficient in many ways when compared to high voltage landscape lighting. It is safe and easier to use, especially in wet conditions. It is energy-efficient, easy installation steps, and doesn’t raise any red light alert for kids and pets. These are good reasons anyone should consider low voltage landscape lighting.
Create a Plan
Begin by drawing up a plan for the available space and how you want each part of the entire space to be lighted. This process is key to knowing how the outdoor design will match the light distribution you are considering and bringing the elegance you imagine. It should include the things you want to light up, the color of the light, and proximity to each other.
Shop for Spot Lights, Pathway Lights, and Security Fixtures
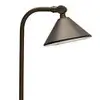
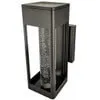
Next is to get all the materials you need to set up your low voltage landscape lighting. The materials may include but are not limited to the following based on your requirements. These are cable (waterproof), transformer, LED fixtures, electrical supplies and accessories, etc. These are general materials, but each low voltage landscape lighting project differs depending on available space, preference, terrain, etc. It is worthy of note that these items are to be purchased based on the specification needed for the project.
There are three installation types to select from. These include straight run installation, split-run installation, and the “T” installation.
The first run its fixtures directly from the transformer. The second has its fixtures run in more than two directions from the transformer. At the same time, the “T” installation enables power distribution of the run. All of them are great and provides excellent results. The choice depends on your project type and the goal to be achieved. So, the option is what tells the network of the cable.
You set up the transformer at a location based on your garden’s lighting design. Then cables are run through prepared terrain. According to the plan, it must be according to the plan as the wires are run through with a connection with the transformer. It is possible to use more than one transformer. It depends on the capacities of the transformer and the project at hand.
Through the beautiful feel and the outdoor illumination that landscape lighting gives, it is a lighting system that you should consider when it comes to lighting up your garden or landscape. The standard voltage system recommended for landscape lighting is always 12-volts. This makes it give a wider choice span, and it does not involve a complex wiring system which allows for easy installation. Low voltage lighting is also safe and uses little energy to function, which can save you a lot of costs.
A low-voltage landscape lighting would help you illuminate that breathtaking garden that you have built around your house when the sunlight sets. Setting up low-voltage landscape lighting can be a DIY with easy installation for you. We have put together directions on how to set up low-voltage spot lights and landscape lighting.
Lay The Cable
You should start by putting the light fixtures where you’d like to install them. Then unwind the low-voltage cables and place them beside the light fixtures. Please keep in mind that the cables have to be about 8 to 10 feet apart. If you encounter any obstacle, you should go under or around it with the cable so as to avoid complications. After this, you should use a shovel to dig in a shallow trench where the cable would be placed. Place the cable in the dug trench and cover up with the little dug-out sand and tap lightly with your boot to have it cover well enough.
Install the Transformer
Low-voltage cables have double-stranded insulated wires. You would have to separate these two insulated wires some inches apart and remove the wire insulation so as to expose the copper part of the cable. Insert the exposed wires in the A and B screw terminals of the transformer. You can then attach the transformer to the wooden stake that’s driven through the ground or to a wall and is well distances from the house. You, however, have to be mindful of the type of electrical outlet that you use as it will protect you from electrical shocks.
Connect The Light
This is the final stage in setting up your low-voltage landscape lighting. You should connect the transformer cord to the outlet to supply it with power. After this, you should connect each lighting into the cable and repeat till all the lightings are connected. The fixtures should light up since the transformer has been fixed in with the cables. Don’t forget to use a plastic cover with the outdoor outlet to prevent it from rain and snow. The plastic cover should also not obstruct or deem the low-voltage lighting.
Your low-voltage lighting landscape is now ready for use and would provide you the illumination that your outdoor garden and the notable features of your house needs. With these steps, you can easily install low-voltage landscape lighting in your house. This would help you save costs on your energy bill and the energy consumption of your overall light. It would also make your home or garden a wonderfully lit space.
With this information, I believe anyone can obtain information about installing low-voltage landscape lighting. While these may give you the basic knowledge, it is advisable to work with an expert in the field to avoid costly mistakes and wasting precious efforts.


